Two editions: direct download and Mac App Store
Mister Plimsoll ships in two editions, both free. The direct download from this site and the Mac App Store edition share the same monitoring features and the same notification channels, with one small difference:
- iMessage alerts are direct-download only. Apple’s App Store sandbox prevents apps from controlling Messages.app, so the Mac App Store edition doesn’t include the iMessage notification channel. Every other channel — on-screen alert, macOS notifications, email, Pushover, and webhooks — is identical in both editions.
Otherwise the editions differ only in plumbing: the Mac App Store edition gets its updates through the App Store; the direct download checks for and installs updates itself in the background.
Where it lives
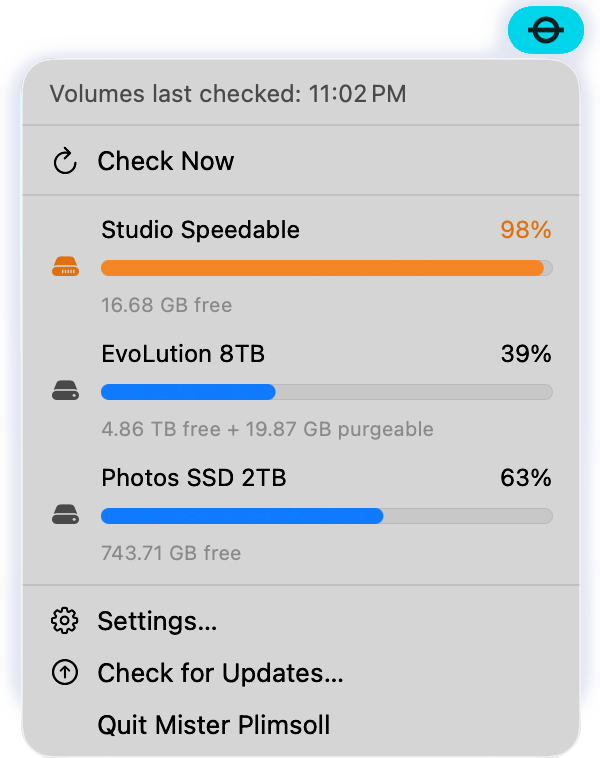
Mister Plimsoll runs in the menu bar. Look for the Plimsoll mark up at the top of your screen. The mark turns orange when one of your monitored volumes is past its threshold, as explained below. (You can opt to show a Dock icon, if you like!)
The first time Mister Plimsoll launches, a welcome screen will provide a little information, so you know how to proceed. You can hide the app from the Dock, too. After that, Mister Plimsoll lives quietly; you only need to revisit Settings when you change something.
Click the mark and you’ll see:
- Volumes last checked. The most recent time Mister Plimsoll ran a check.
- Check Now. Forces an immediate check. (Direct download version only.)
- Drive listing. Each drive or volume appears in this list with a percent-used readout, a percentage-used bar, and a free-space breakdown. The bar turns orange when the storage used is over the volume’s threshold, as shown in figure.
- Settings. Opens the preferences window (or press ⌘,).
- Check for Updates. Manually check for a new build .
- Quit Mister Plimsoll. Exit the app and stop monitoring.
Volumes tab
Settings > Volumes is where most of the work happens. You can drag volumes into any order you want if the default is not to your preference. It has three logical sections, explained from top to bottom.
Schedule and behavior
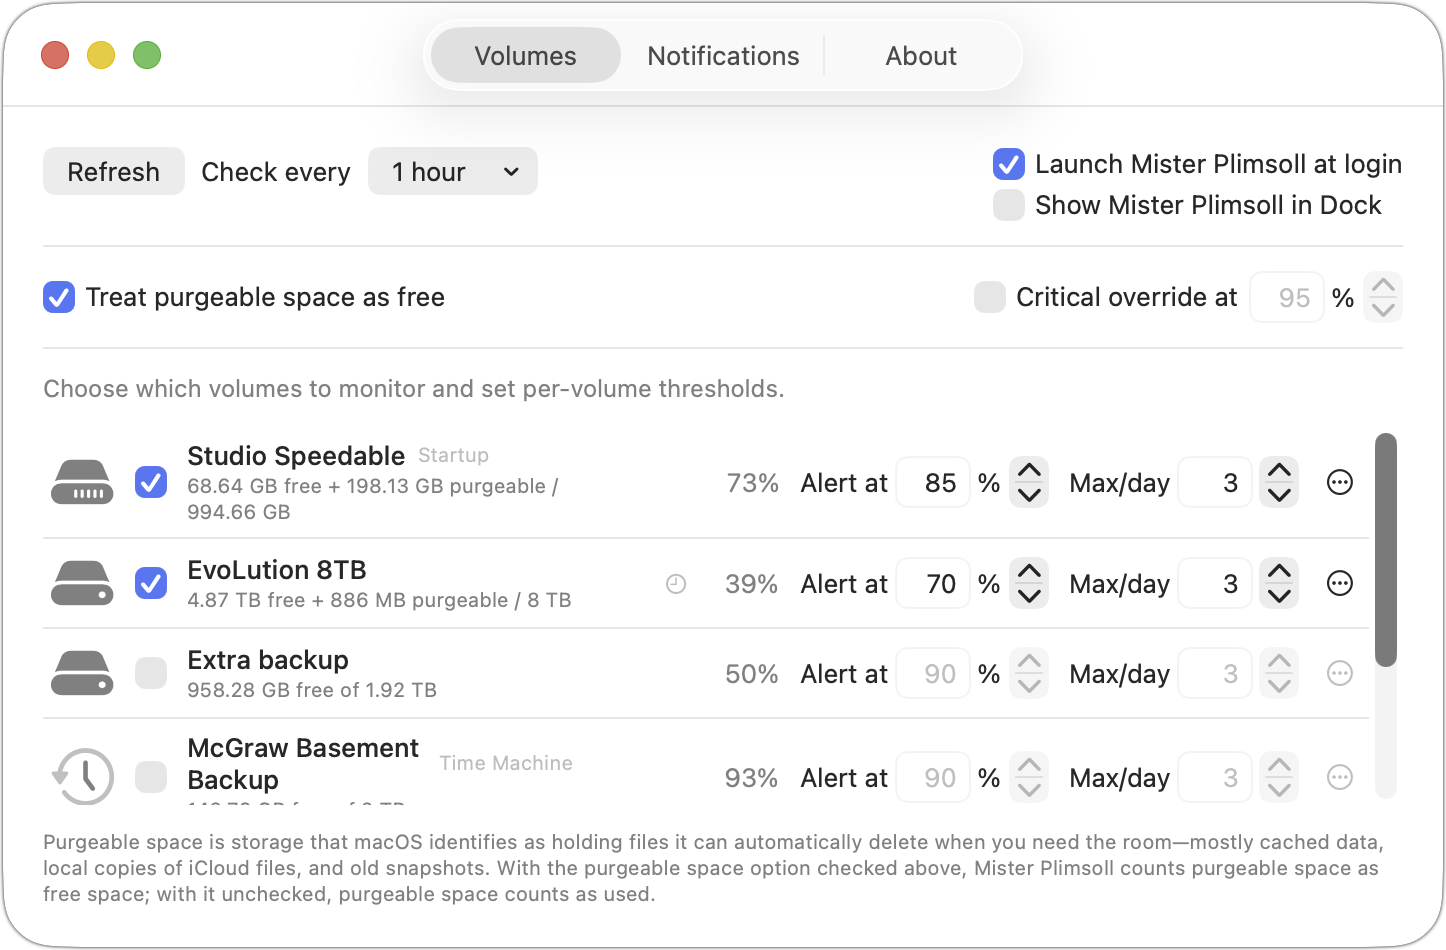
- Refresh. Force an immediate check — this is the same as Check Now in the menu bar.
- Check every interval. Preset to 1 hour, you can choose a different interval from the pop-up menu, where you can also choose Other and enter your own interval in minutes or hours.
- Launch Mister Plimsoll at login. Default is on. Without this, monitoring stops when you restart or log out.
- Show Mister Plimsoll in Dock. Most people prefer the menu-bar-only footprint. Turn this on if you want a Dock presence.
Storage policy
Two settings affect how percent-used is calculated and how aggressively alerts fire when a drive is critically full.
Treat purgeable space as free. The default is on, matching Apple’s recommendation. Purgeable space is storage macOS will reclaim on demand: caches, snapshots, local copies of iCloud-stored files. With this on, Mister Plimsoll considers that space available and the percent reflects what’s actually occupied by data macOS won’t auto-clear. Disable the setting and you’ll see the stricter view: every byte currently occupying the drive counts as used, including reclaimable caches. The percent will climb sooner, and alerts will fire earlier.
Critical override at N%. Disabled by default; when enabled, the default is 95%. When any volume crosses this threshold, alerts continue firing for it even after the per-volume daily cap is exhausted, with a 15-minute break between repeats. This is designed to let you know if any volume reaches a critical point, overriding the maximum-per-day alert setting available for each volume below.
The volume list
Each internal or locally connected volume has its own entry in the list. (Networked volumes and mounted disk images are excluded automatically.) For each volume, you see:
- A monitor checkbox. The startup volume is checked by default; everything else is opt-in.
- The drive’s name and capacity readout. When purgeable space is meaningful (more than 100 MB), it’s shown alongside the raw free figure.
- A percent-used number, reflecting whatever the storage-policy toggle says.
- Alert at N%. The per-volume threshold. Default 90.
- Max/day N. Per-volume daily alert cap. 0 means unlimited; default 3.
- Time Machine usage. Because Time Machine snapshots or usage can be part of what causes a volume to fill past your threshold, Time Machine usage appears in two ways, both shown in the screen capture above. First, if you are over your set limit, an item appears that notes the size of Time Machine snapshots and links to Apple’s support note on removing unnecessary ones. Second, the current Time Machine storage occupied is shown on Time Machine backup volumes.
- More (…). Choose this item to check a volume at a different frequency than the overall period. A clock icon indicates volumes with a custom setting.
Notifications tab
Mister Plimsoll can deliver alerts through six channels. They’re independent toggles — turn on as many as you want. Channels are described below in the same top-to-bottom order they appear in the tab.
On-screen alert
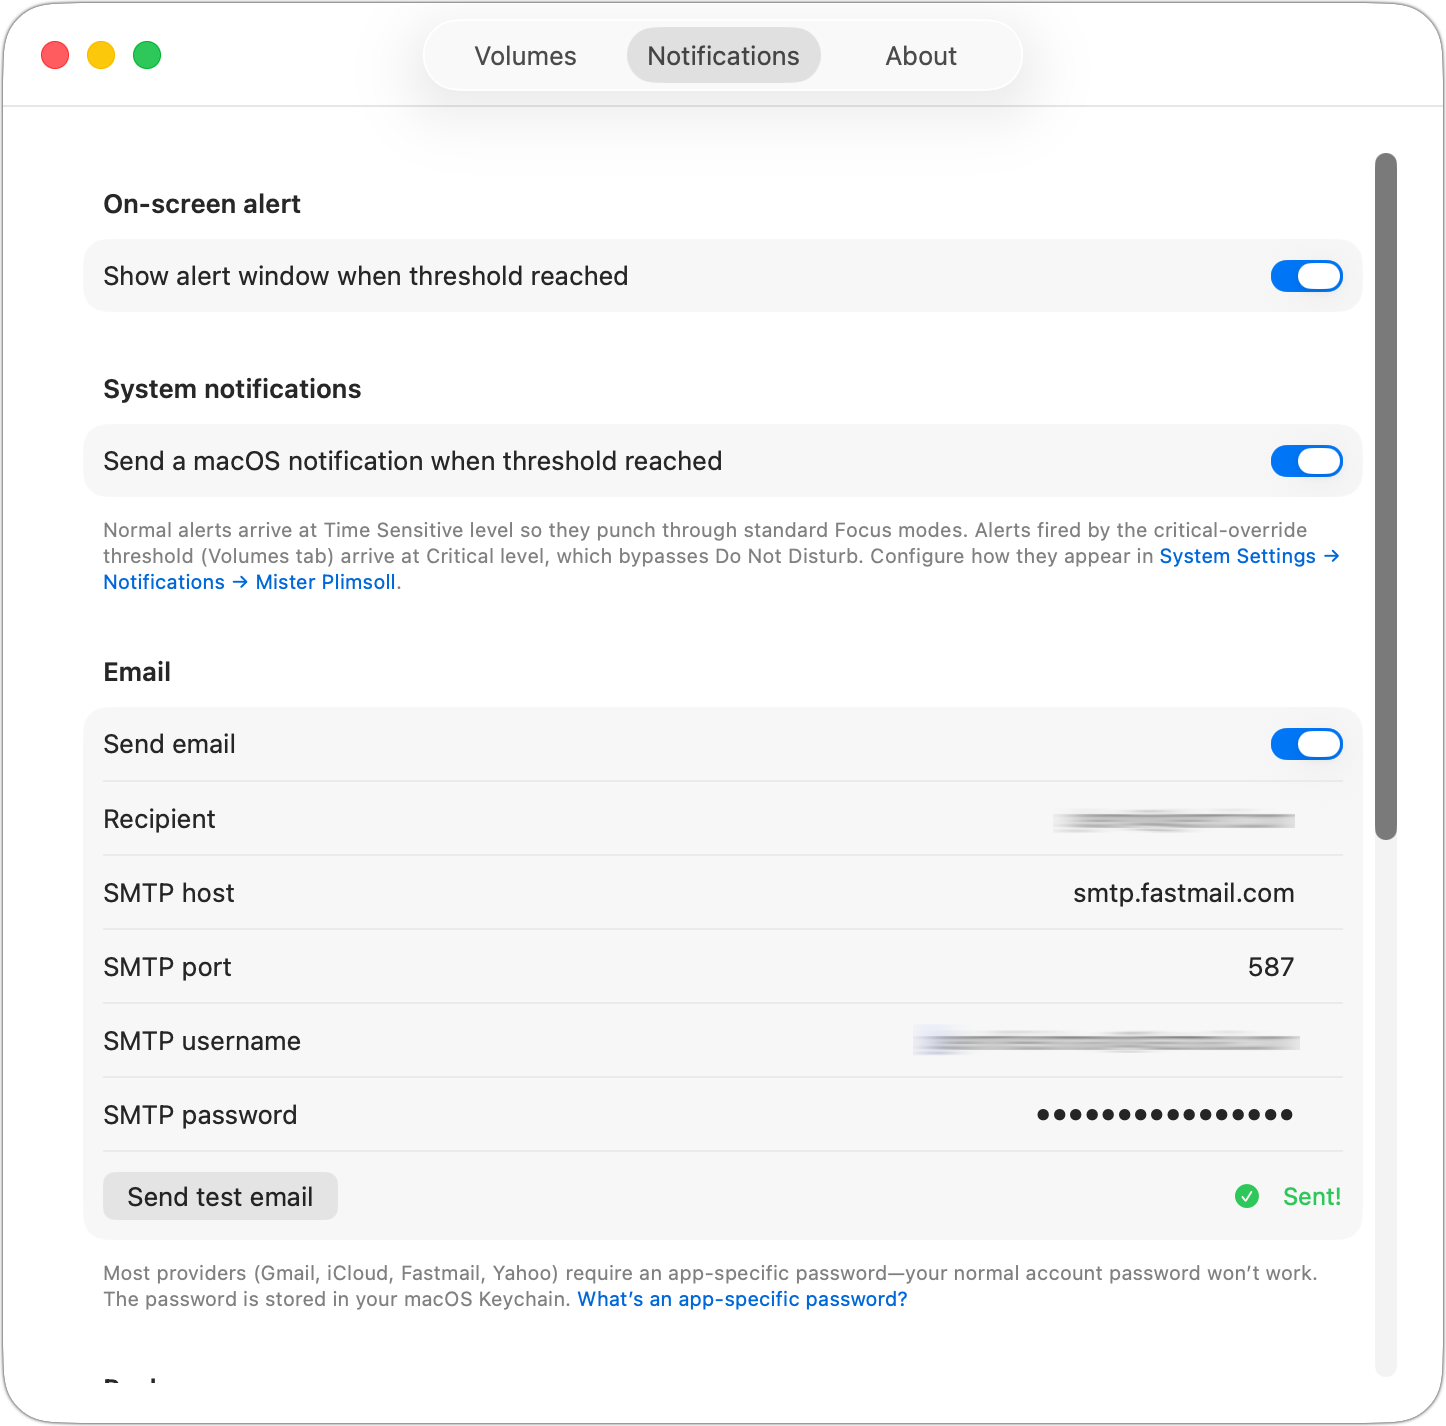
A floating window with the volume name, percent-used, capacity, and a Reveal in Finder button. This alert is enabled by default. The floating window stays put until you dismiss it; dismissing manually clears the active state so at the next check, the alert can reappear if the volume remains over threshold.
System notifications
A macOS notification arrives in Notification Center with the volume name, percent used, and free-space breakdown; notifications are enabled by default. The first time it fires, macOS will ask you to allow notifications from Mister Plimsoll — say yes, and they’ll appear thereafter without prompting.
Notifications are sent at Time Sensitive priority, which means they show up even when you’re in most Focus modes. Alerts fired by the critical-override threshold (see the Volumes tab) are prefixed with “Critical:” so you can spot the escalation at a glance in Notification Center. If you want to tweak the sound, banner style, or grouping, head to System Settings › Notifications › Mister Plimsoll — the link in the Notifications tab opens that pane directly.
Mister Plimsoll connects directly to your email provider’s SMTP server, but your details never leave your computer (see privacy policy). Here’s what you configure:
- Recipient. Where the alert goes. Yourself is fine; a shared address is also fine.
- SMTP server and user. Enter the SMTP host, port, and username, as provided by your email provider. Port 587 is the default, but you can change this if your provider requires a different one.
- SMTP password. Most providers (iCloud, Gmail, Fastmail, Yahoo) require an app-specific password rather than your main account password. Stored in your macOS Keychain.
- Send test email. Sends a test message so you can confirm the setup works.
Actual emails triggered by Mister Plimsoll include the volume name, and details of storage: used, purgeable, free, and total.
iMessage
Mister Plimsoll uses Messages on your Mac to deliver an iMessage to whichever Apple Account you specify by email address or phone number. (Direct-download version only. SMS/MMS, RCS, and group iMessage are not supported.)
Important: Apple doesn’t notify you when you send yourself an iMessage. But it will appear in your Messages app.
The settings are:
- iMessage handle. Enter your (or another appropriate) email or phone number associated with an Apple Account.
- Send test. I recommend clicking “Send test message” to trigger the macOS Automation permission dialog, then click to allow. This is only required once.
- Reset and try again. Appears if macOS reports a permission problem. It clears the Automation record and re-tries the send so you don’t have to dig into Terminal.
Pushover
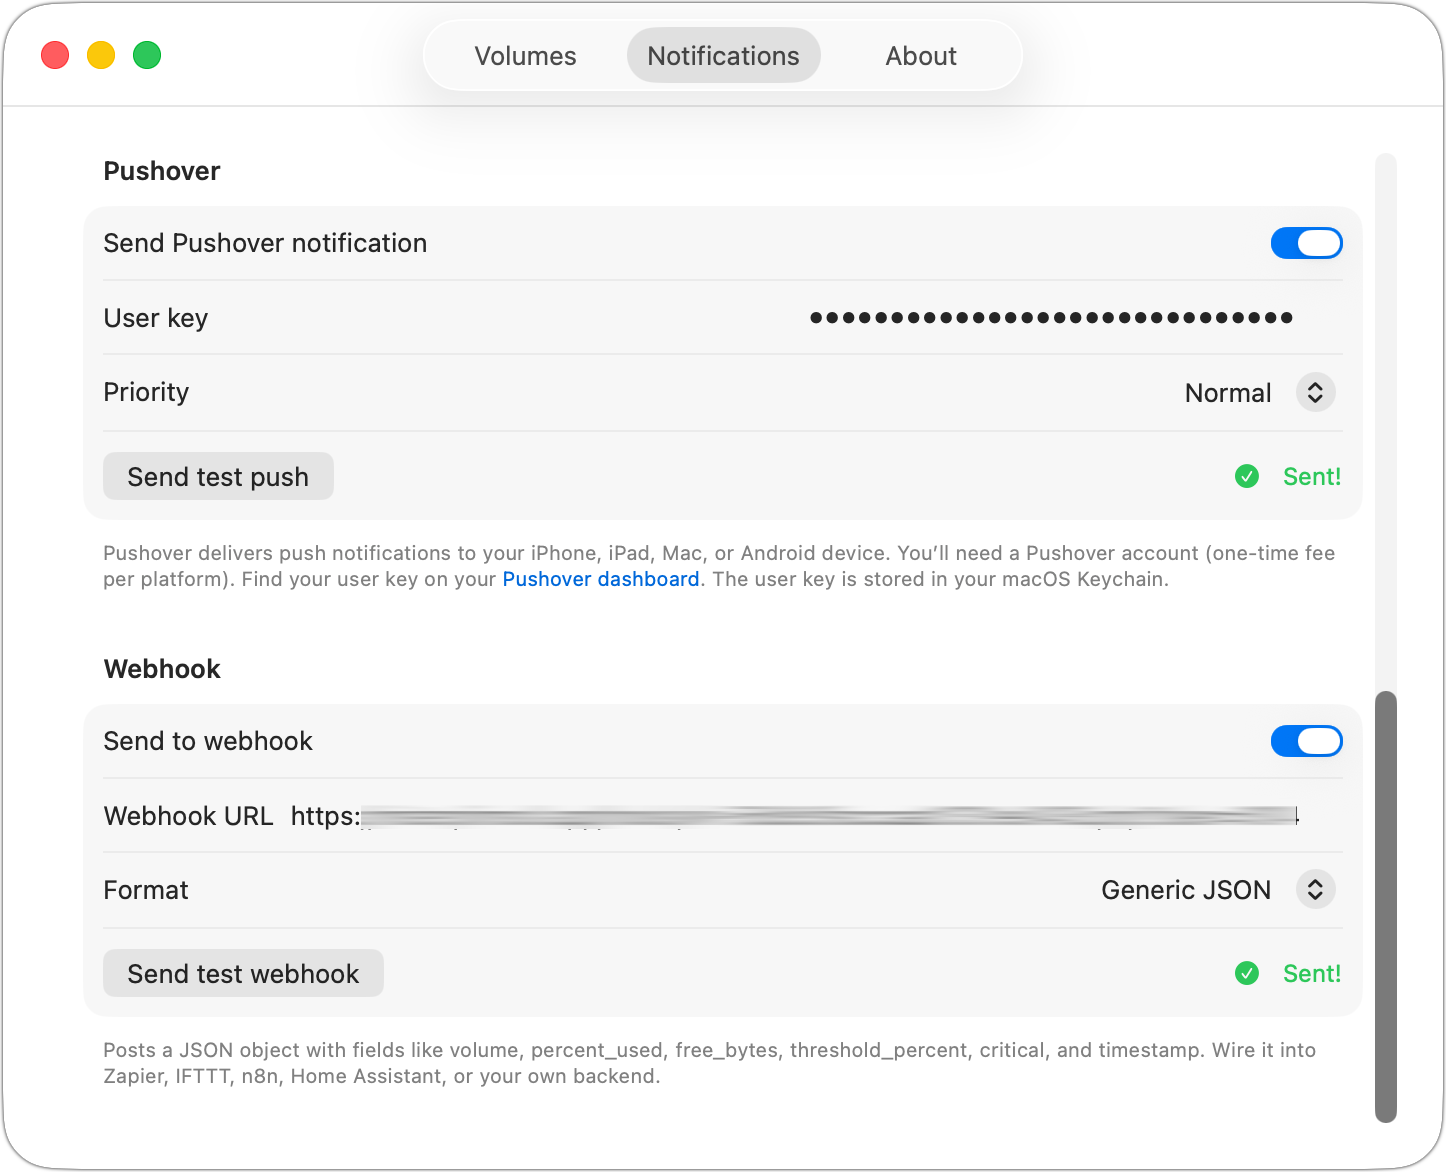
Pushover is an app-based service that lets you receive push notifications on an iPhone, iPad, Mac, or Android device with a simple account setup. The service has a free trial, after which it charges a one-time per-platform fee of $5. The app includes priority controls and a quiet-hours bypass.
- User key. Find this on your Pushover dashboard after signing up. Stored in your Keychain.
- Priority. Low (silent), Normal, or High (bypass quiet hours).
- Send test push. Confirms your setup works before you trust it for real alerts.
Webhook
For those who want to tie Mister Plimsoll into their workflow or messaging systems, you can enable a webhook. This lets the app use POST to send an HTTP request to a URL you supply whenever a volume crosses threshold. This is the catch-all channel: use it with Slack, Discord, Zapier, IFTTT, n8n, Home Assistant, or any service or self-hosted endpoint that accepts an incoming webhook. Settings:
- Webhook URL. The endpoint to POST to. Must be HTTPS in the upcoming App Store build; HTTP is also accepted in the download version.
- Format. Choose how the body is shaped:
- Generic JSON. A structured payload with fields including
volume,machine,percent_used,free_bytes,purgeable_bytes,total_bytes,threshold_percent,critical, and an ISO 8601timestamp. The right choice for automation tools and self-hosted backends. - Slack. POSTs a Slack-compatible
{“text”:…}body. Paste an Incoming Webhook URL from your Slack workspace’s App Directory. - Discord. POSTs a Discord-compatible
{“content”:…}body. Create a webhook from a Discord channel’s Integrations settings.
- Generic JSON. A structured payload with fields including
- Send test webhook. Fires a sample payload so you can confirm the URL is reachable and the format is right.
About tab
I am sure you care very much about the About panel, so let me tell you the details! It shows the version number, offers a Check for Updates link, and provides my contact information, as well as a link to the privacy policy and changelog. Oh, most importantly, it has a tip link in case you find this app valuable enough to buy me a cup of ☕.
Help
If something’s not behaving the way it should, email misterp@misterplimsoll.app. There’s a separate guide on creating app-specific passwords if your email provider requires one.